There are many writers who have their dream books in pipelines but they aren’t published yet because the writers are looking for a publishing house to show interest in their books.
But we live in a world powered by the internet and you no longer need to get your book printed to reach millions of people. Instead you can write eBooks and sell them on Amazon to start earning quickly and extensively.
I already did an article about how you can self-publish your book on Amazon Kindle, but this article is about how you can format your eBook on Microsoft Word to get ready for Kindle.
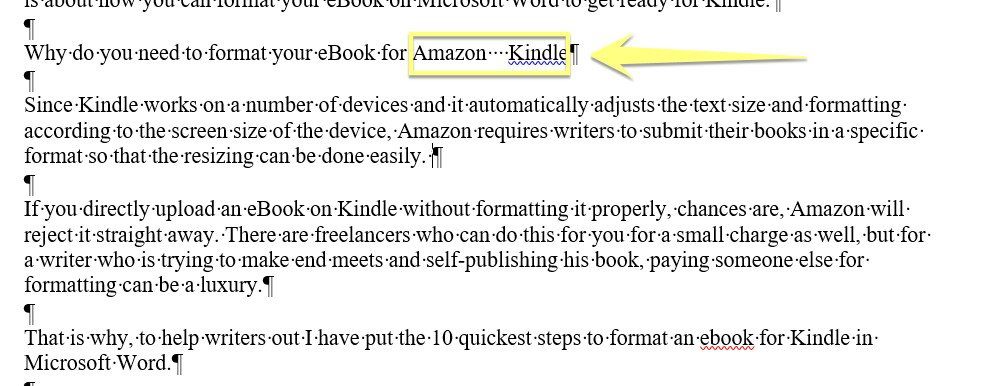
Why do you need to format your eBook for Amazon Kindle
Since Kindle works on a number of devices and it automatically adjusts the text size and formatting according to the screen size of the device, Amazon requires authors to submit their books in a specific format so that the resizing can be done easily.
If you directly upload an eBook on Kindle without formatting it properly, chances are, Amazon will reject it straight away. There are freelancers who can do this for you for a small charge as well, but for a writer who is trying to make ends meet and self-publish his book, paying someone else for formatting can be a luxury.
That is why, to help writers out I have put the 10 quickest steps to format an ebook for Kindle in Microsoft Word.
1. Edit your eBook (pretty well)
Before you move ahead with formatting, you have to make sure your eBook is 100% edited and there are absolutely no changes to be done. While you can make edits later, that will only increase your formatting time.
Formatting the content
2. Activate the paragraph marks button
Open your eBook is open in Microsoft Word (I am using Word 2016) and click on the paragraph sign that looks like a “P.” As soon as you click on it, you will be able to see dots (.) and the P sign all throughout your content.
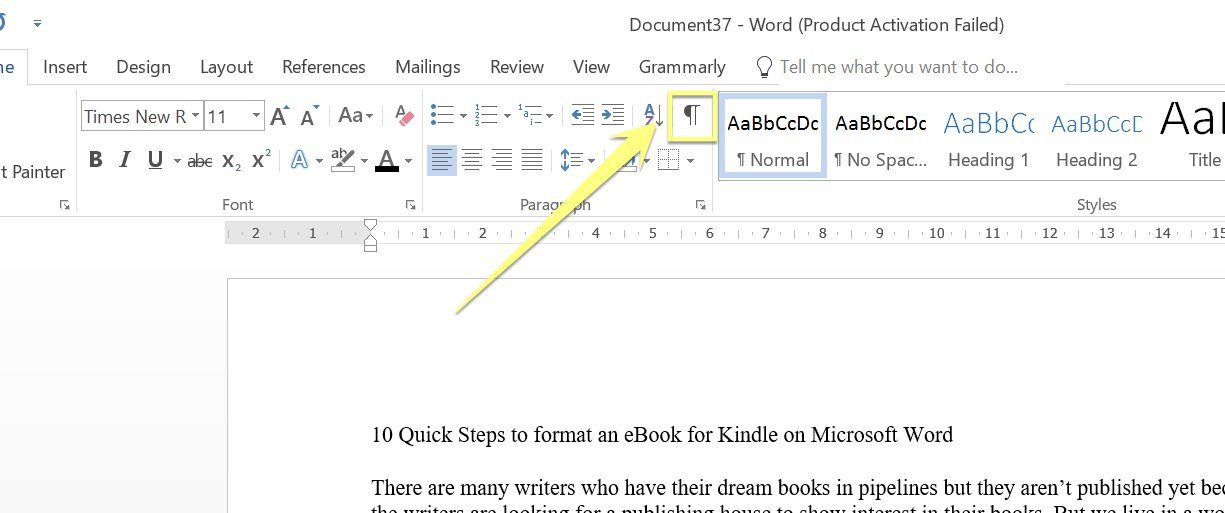
The dot represents a single space
P sign represents a new line
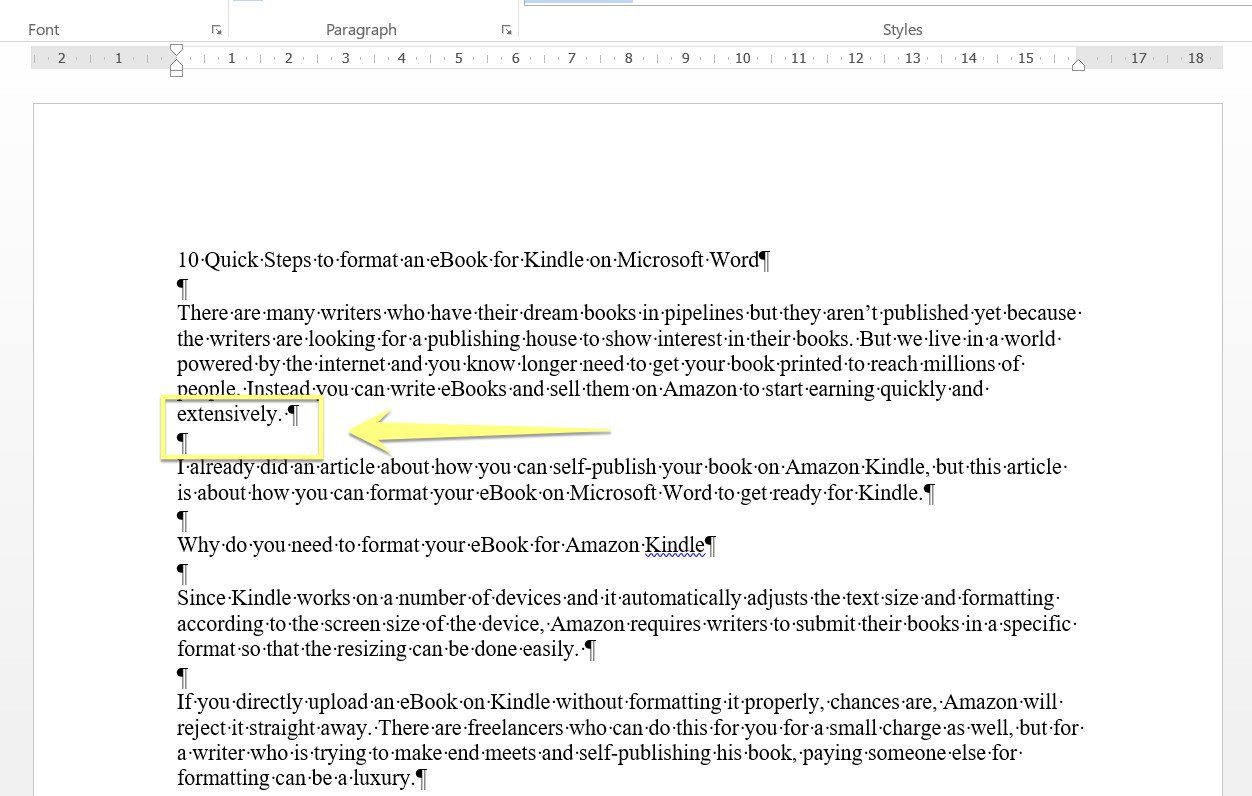
3. Make sure after every paragraph there is only a single space
Now, comes the most tiresome part of the entire editing process – Scan through all of your content to make sure
There is only a single line space between all the paragraphs. So, there should only be a one P sign mark between paragraphs. If there is more than one, then just delete it.
4. Check for any excessive spaces
Spaces are represented by dots, so you need to ensure there are no excessive spaces anywhere. Between the content or before it. There should also be no indentation. All the content should start from the left corner.
Kindle doesn’t work well with numbered or bulleted lists, so its best to remove them completely. By default when you type “1. First point” or a bullet in Word, it indents the list automatically. Now we don’t want that.
So, it would be best to deactivate automatic numbering and add points manually if you need to. By the way, indenting is shown by arrows, so its easy to find where they are and remove them.

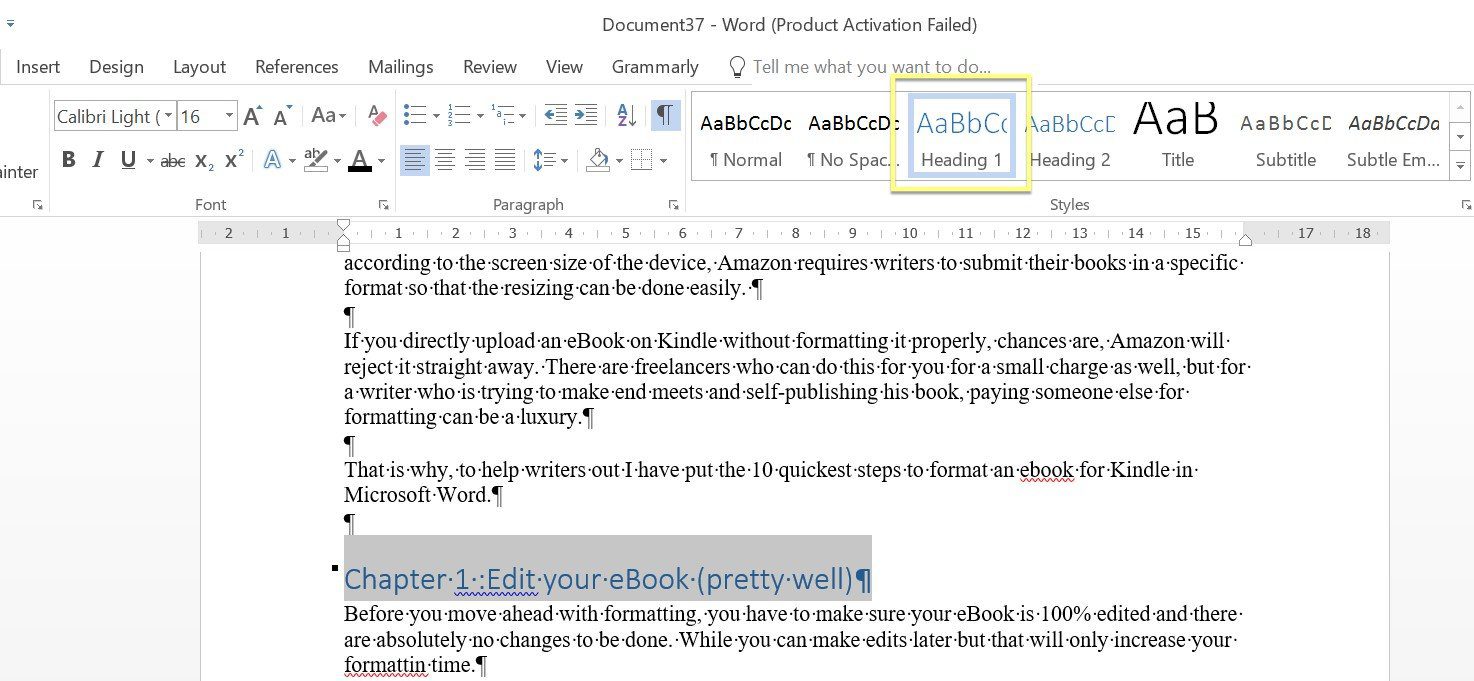
5. Every chapter title should be Heading 1
All the chapters titles in your eBook should have Heading 1 only. To do that, just select the title and click on the ‘Heading 1’ title on top of the Home tab.
Adding pages and table of content
6. Add a front page and copyright page
The front page doesn’t have to be anything fancy because you will anyway be uploading the cover page separately on Kindle. So you can just write
Book Name
By
Author
The copyright page too can be exhaustive if you want or a single line one.
7. Add Table of Content
One of the most important parts of the book is the Table of Content. For starters, it should come directly after front page and copyright page, nowhere else.
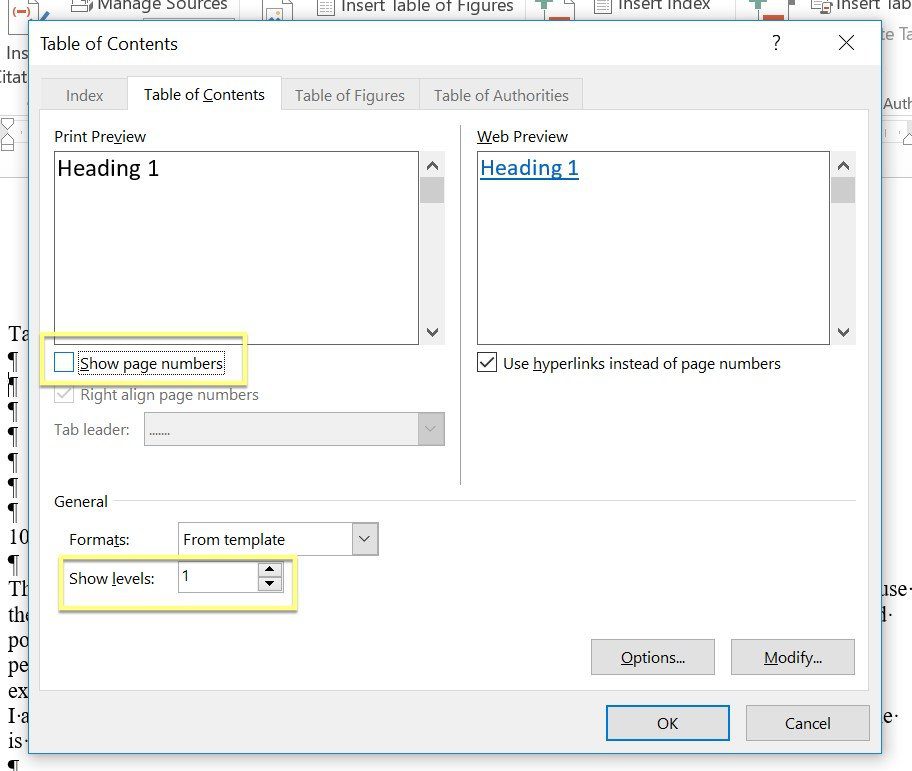
To add TOC, go to the “References” tab and click on the Table of Contents option. Choose the “Custom table of content” option at the bottom.

On the new page that opens, uncheck the “Show page numbers” option since Kindle automatically assigns page numbers to your books according to the reader’s device. In the “Show levels” option decrease the number to 1. This will only show the content in TOC that has Heading 1 — which are the chapter titles.
Your table of content will be hyperlinked, even though it may not “look hyperlinked. To cross check, press CTRL button on your keyboard and while pressing, click on any chapter titles. You should be taken directly to the start of that title.
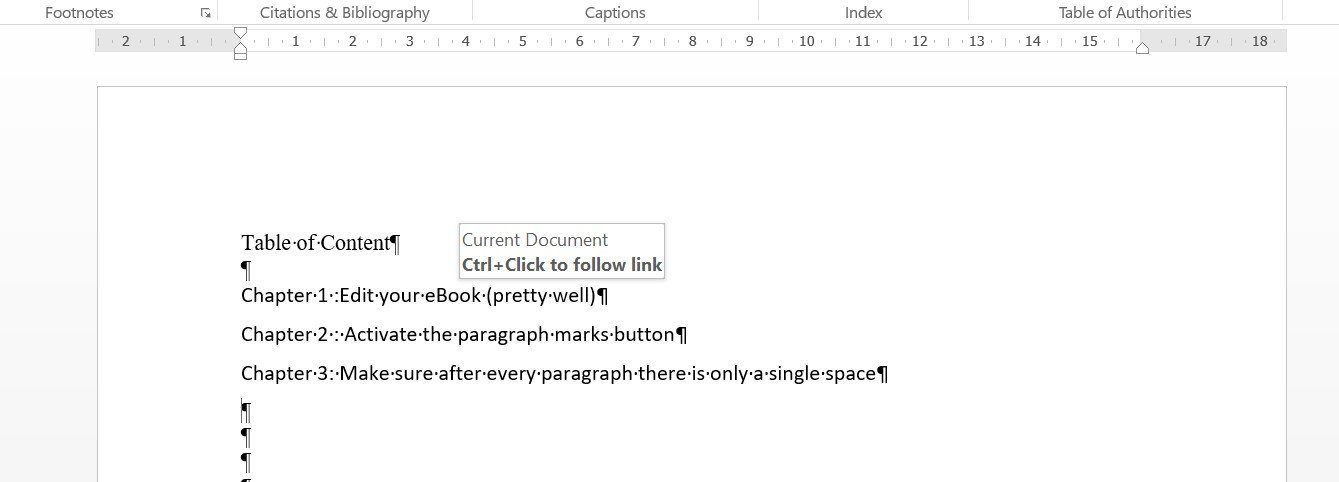
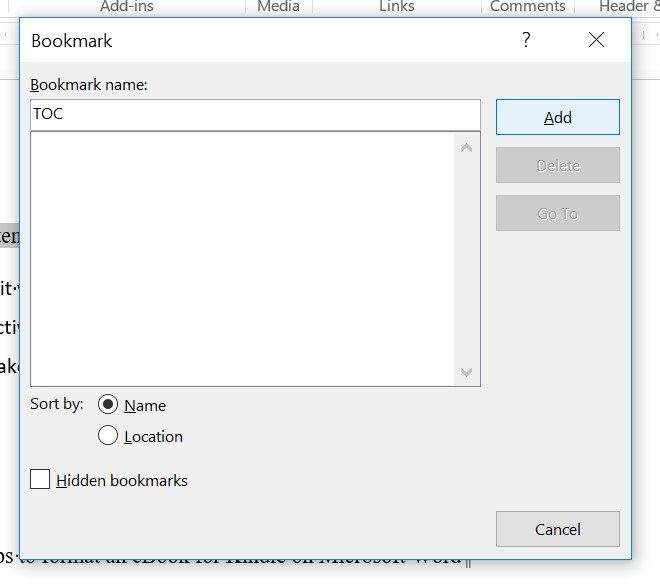
Once that is done, select the text Table of Content, go to “Insert” tab and click on “Bookmark.” Name the new bookmark as TOC and click OK.
8. Insert page breaks
Now we come to the easiest part of the formatting process — Adding page breaks.
The page break option is present under the Insert tab or you can also press CTRL + Return. You need to add a page break option after:
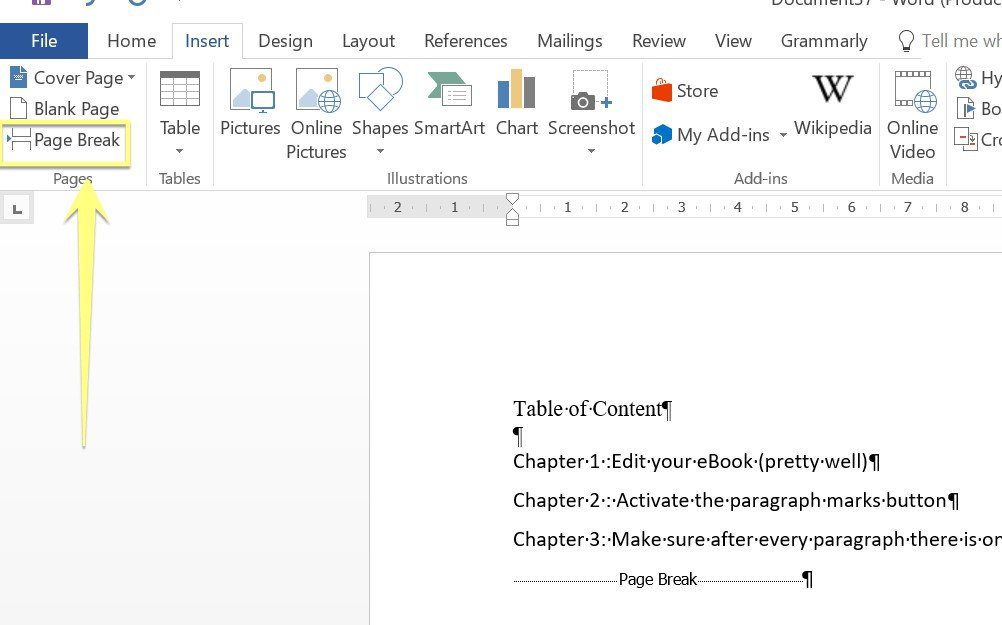
Front page
Copyright page
Table of content
At the end of every chapter
9. Save the formatted eBook
Once you are done with your eBook formatting, save it as an HTML page because that is the format Kindle accepts
10. Preview with Kindle Previewer
Amazon has a Kindle Previewer which allows users to preview their eBooks in advance before they submit them for upload to make sure all the formatting is done right and there are no blank pages. You can download the previewer from here.
Once you are done checking, you can upload your eBook to Kindle.


2 thoughts on “10 Quick Steps to Format an eBook for Kindle on Microsoft Word”
Hi Ritika,
I am a regular reader of your blog. My query is not related to this article, hope it is fine for you. I could see that you are having Adsense ads in your blog. Is it profitable?
Can you please write an article on how you earn a living through Blogging if it is fine for you?
Hi Merin
I do not run this blog for an income. I just do it to share information. So, I wouldn’t be able to give you any idea regarding that